
"I want to start a WordPress blog or website, but setting up the server and domain seems difficult..."
For those who have such concerns, this article summarizes how to start a WordPress blog or homepage on Xserver.
The author, who has been using WordPress for over 10 years, will explain it in an easy-to-understand manner for beginners.
The relationship between Xserver and WordPress
人気のRental server"Xserver」は、WordPressとの相性が非常に良く、以下のような特徴があります。
- Quick start for easy initial setup
- WordPress easy installation feature included
- Fast and stable display speed
- Security Featuresも充実
What you need before starting a WordPress blog
- Xserver application(無料お試し期間あり)とプランの選択
- 無料期間が過ぎたら料金の支払い
- 独自ドメインの取得(エックスサーバーなら永久無料特典あり)
- Install WordPress (free)
▶ Learn more about Xserver's free trial
Steps to start WordPress on Xserver
There are two ways to start using WordPress on Xserver:
- WordPress Quick Start
Install WordPress at the same time as signing up for Xserver - WordPress Easy Install
A feature that allows you to easily install WordPress after signing up for Xserver
This site also used Xserver's easy WordPress installation feature.
Simultaneous setup with "WordPress Quick Start"
"WordPress Quick Start" is a feature for beginners that automatically completes all of the following when you sign up for Xserver.
- Server Contract
- Acquire and set your own domain
- Installing WordPress
- SSL settings (security measures)
- Issuance of initial login information
The advantage of this service is that you can start using your WordPress site immediately after signing up, so even beginners can start a blog in as little as 10 minutes. However,Please note that you cannot use the free trial period and fees will be charged at the time of application.is required.
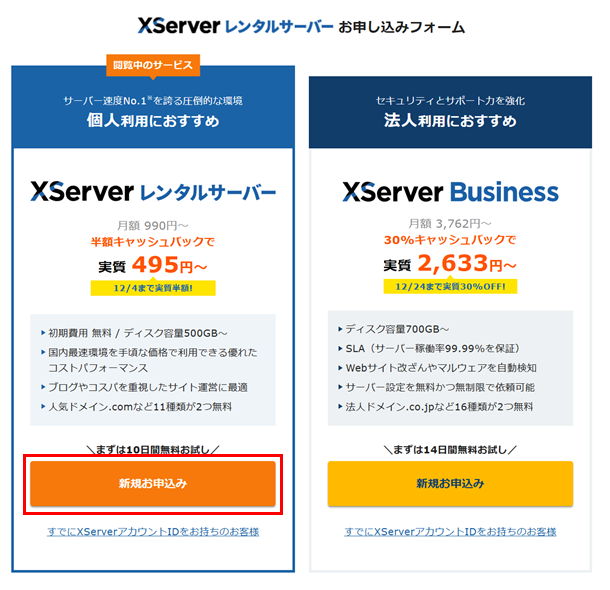
To get started with the WordPress Quick Start,Xserver official websiteClick a button such as "New Application" from
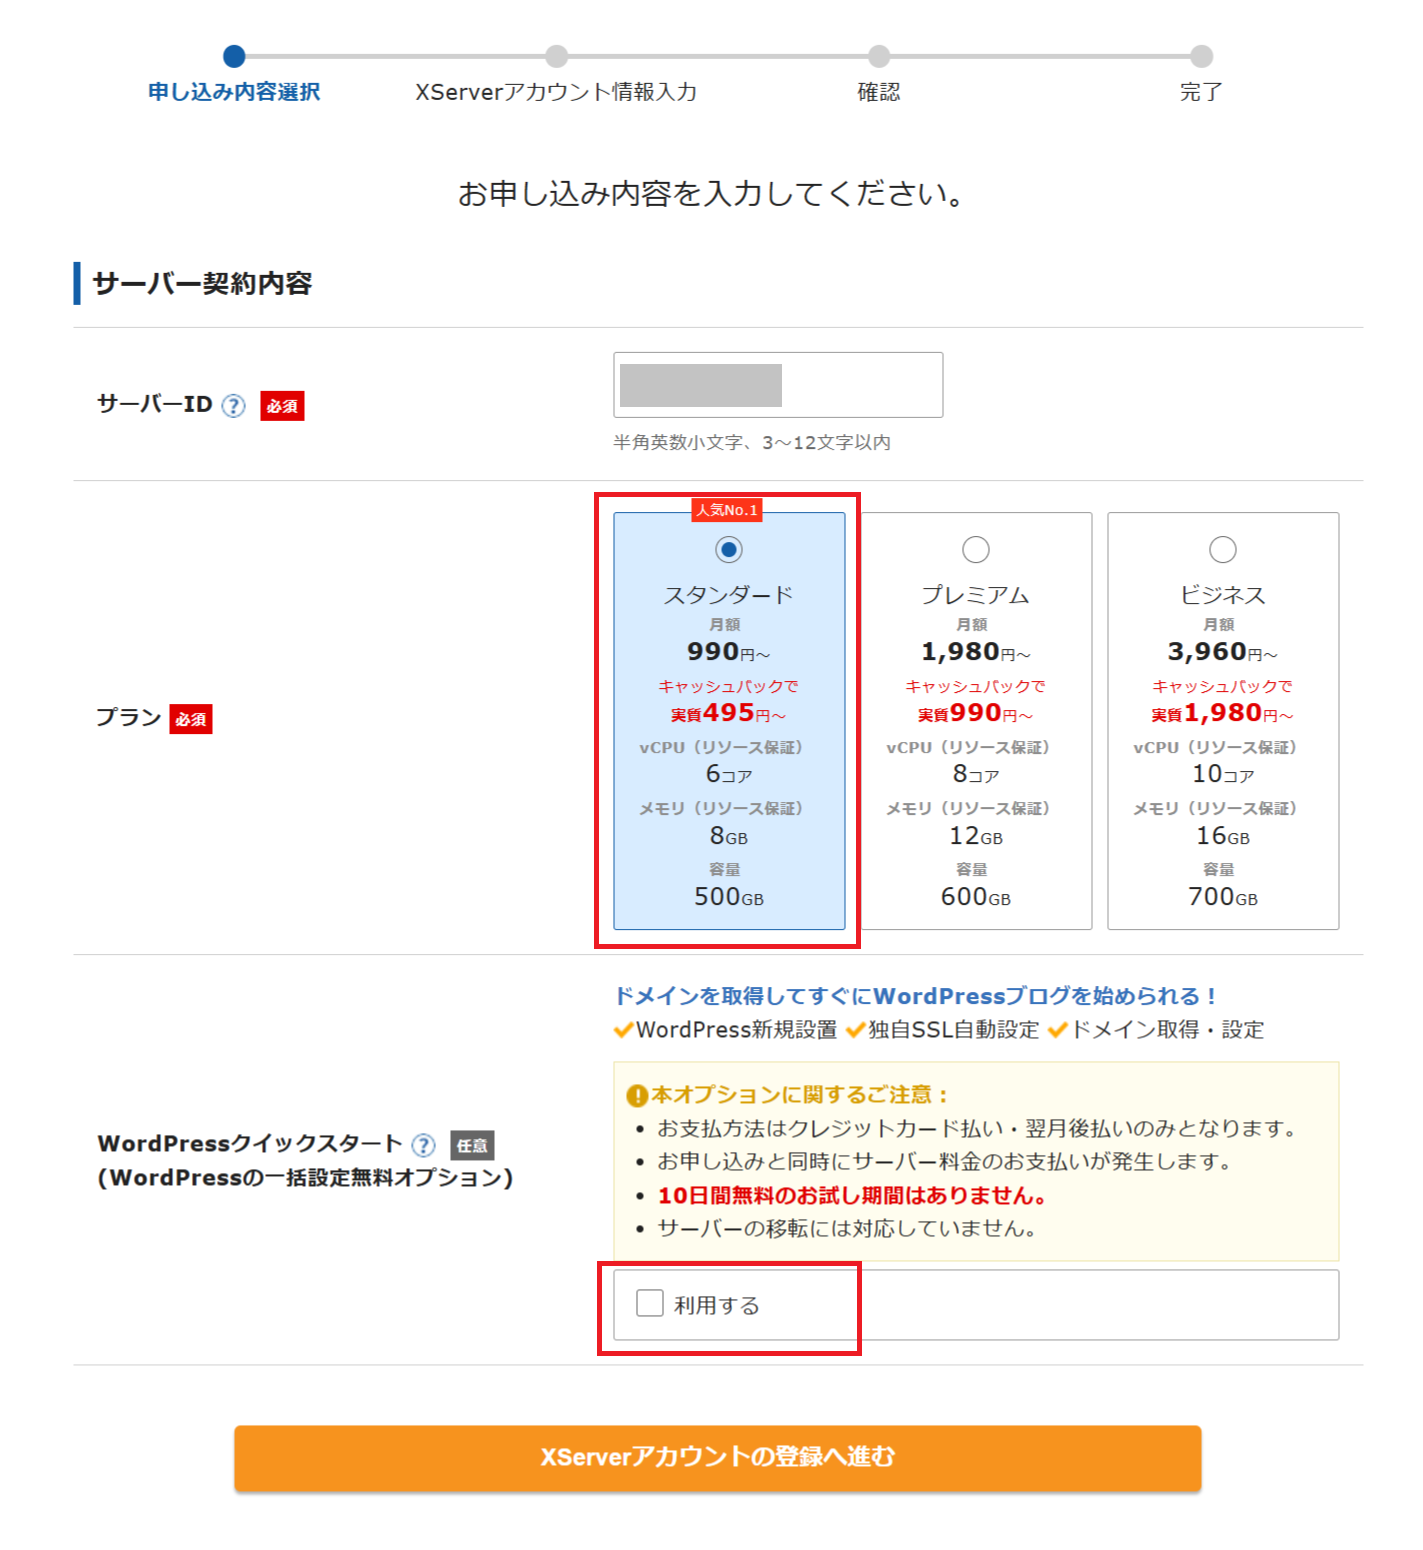
Select your pricing plan and check the box for “WordPress Quick Start.”
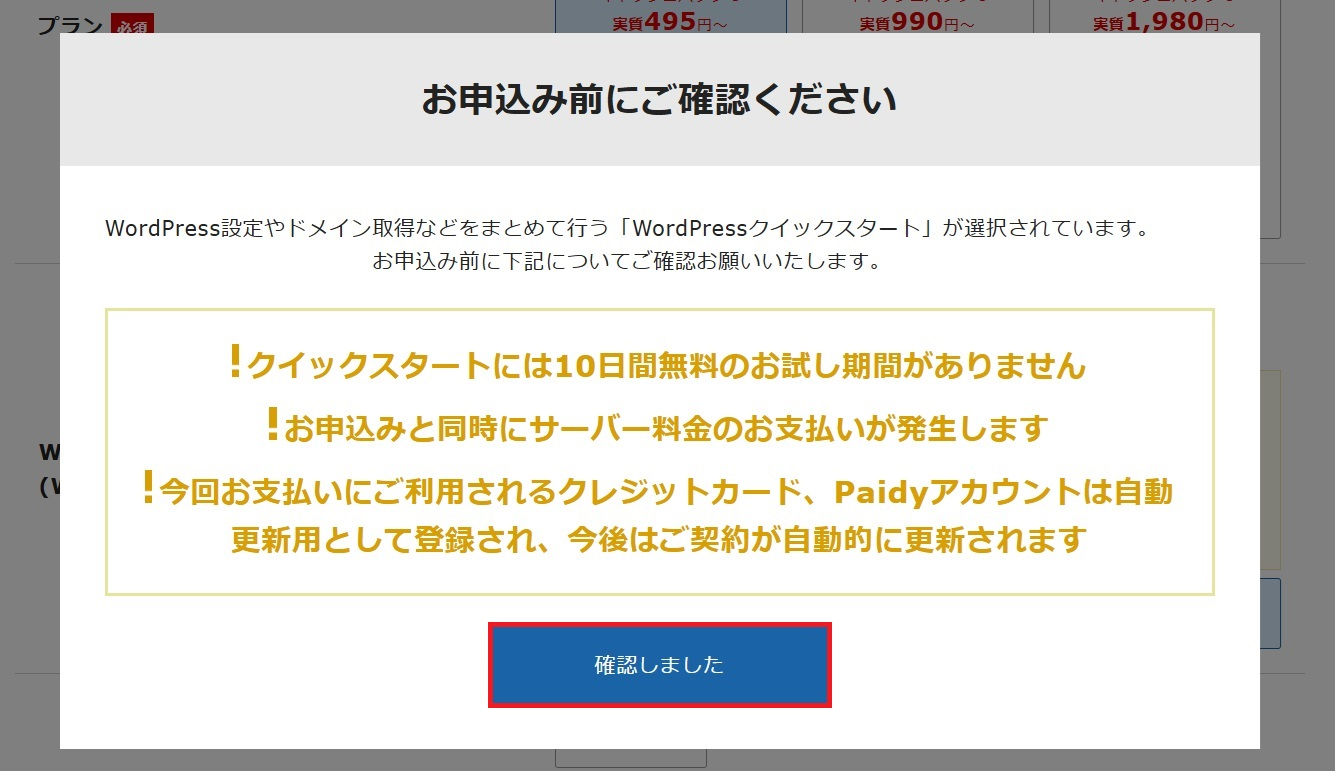
Once you have checked the notes, press "I confirm."
Select the server contract period.

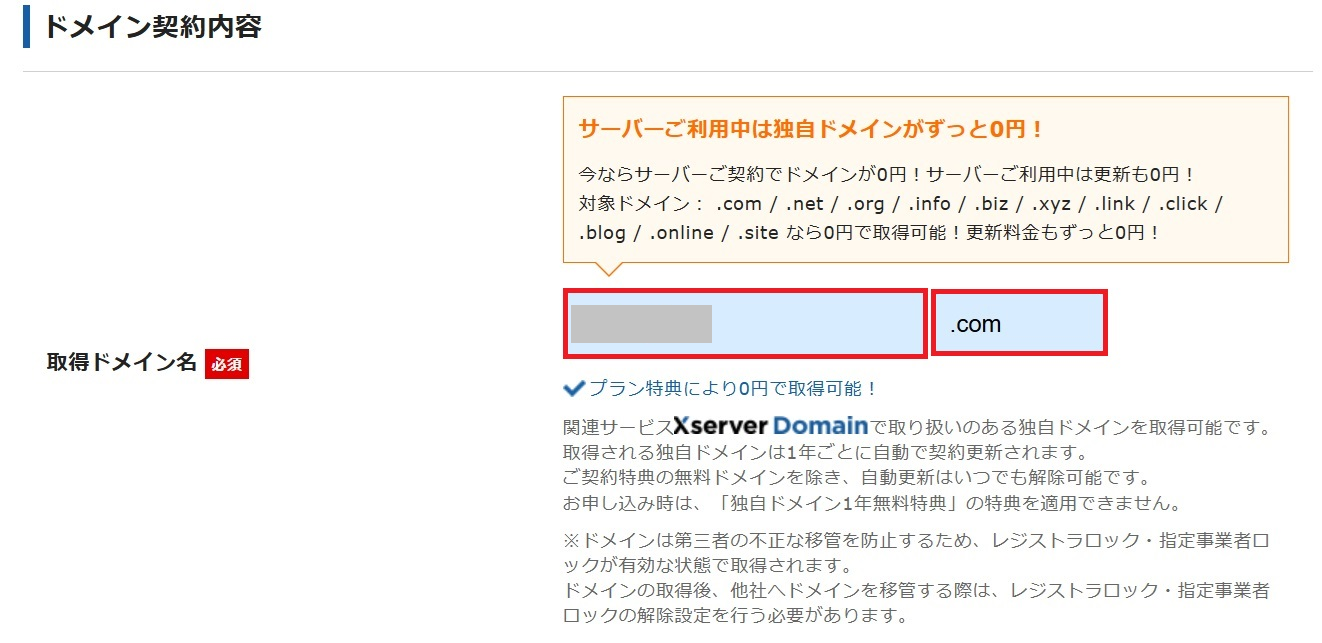
Set the unique domain name you want to acquire. A unique domain is a part of a URL, such as "xxx.com" or "xxx.org".
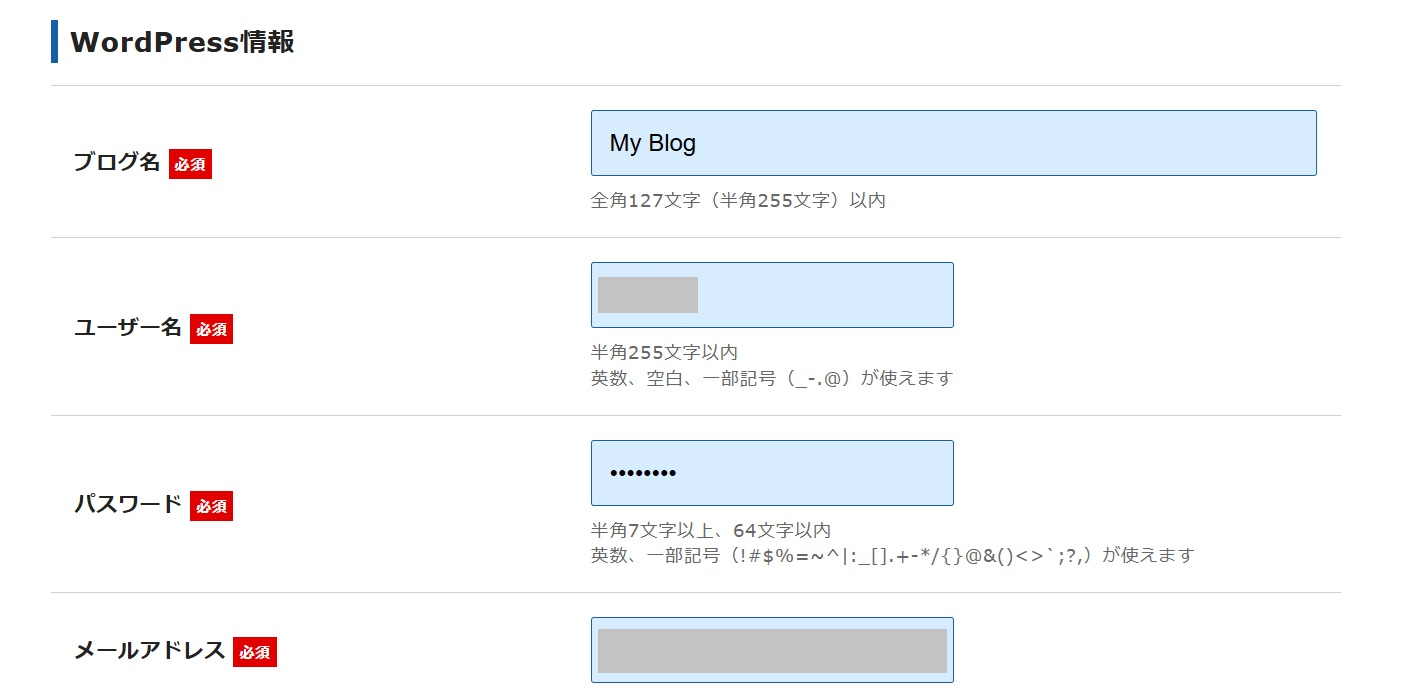
Enter your WordPress blog name (site name), username, password, and email address.
Although it says "Blog Name", if you want to create a website or online store with WordPress, you can also enter the site name in this field. You can also change it later.
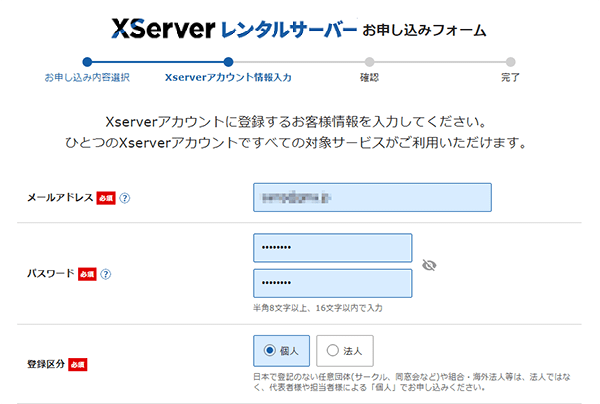
After that, enter the required information for your Xserver account and register.
After that, simply verify your phone number or send an SMS to complete the process.
When using the "WordPress Easy Install" feature
Even if you don't choose "Quick Start" and start with the free trial, you can easily install WordPress later. Follow the steps below.
Apply and register for an Xserver account
まずは、公式サイトから通常通り申し込みましょう。Xserver official websiteOnce you're there, click on the "Free Trial" button.

Select a pricing plan and proceed with your application without checking “WordPress Quick Start” at the bottom of the page.

Enter the required information, verify via SMS (short message) or phone number, and once your Xserver account has been created, proceed to the next step.
Acquire and set up your own domain
At Xserver, you can acquire one or two custom domains as a permanent free gift from your My Page.
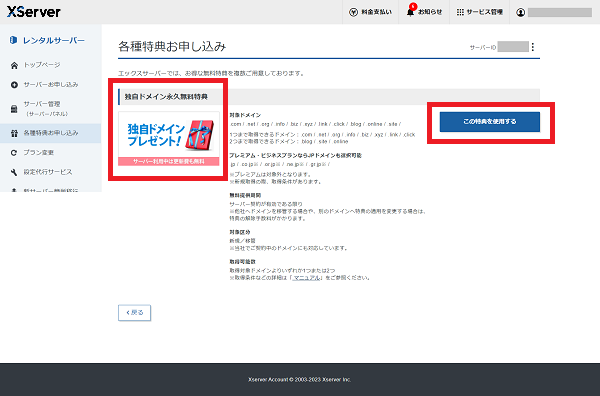
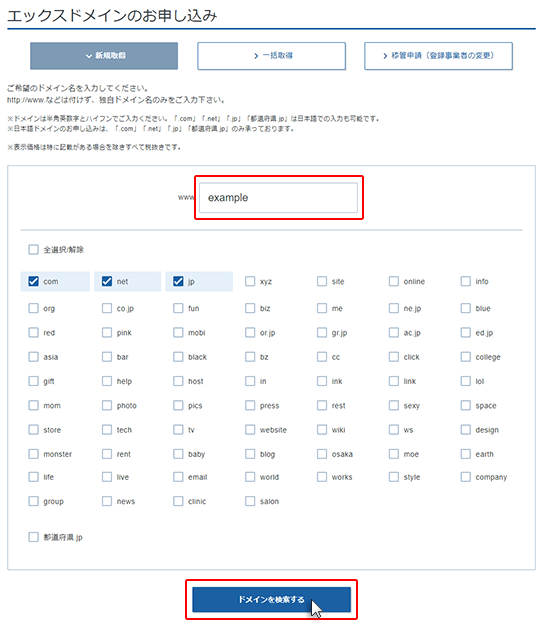
If you operate multiple websites, you can also acquire a domain for an additional fee. Click "Acquire Domain" from My Page.
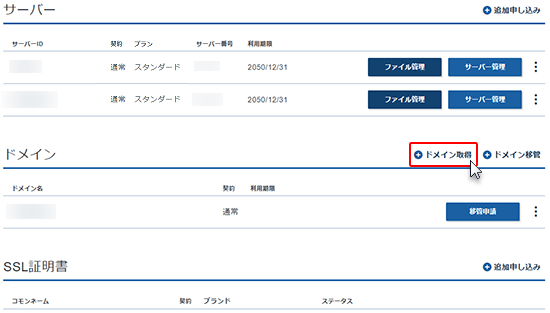
You can enter any domain in the input field, and if it is not claimed, you can apply for it for a fee.
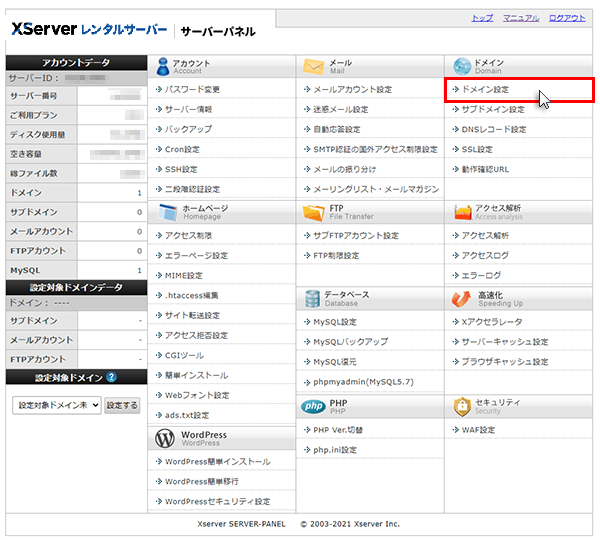
Link the acquired domain to the rental server. Click "Domain Settings" from My Page.
Enter the domain name you have acquired and check "Free proprietary SSL (security measure)" and "X Accelerator (high speed/access number expansion function)."
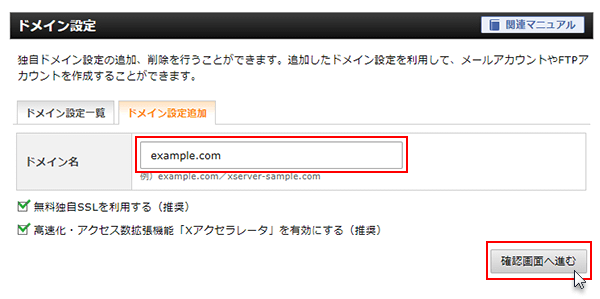
Then just follow the on-screen instructions to complete the process.
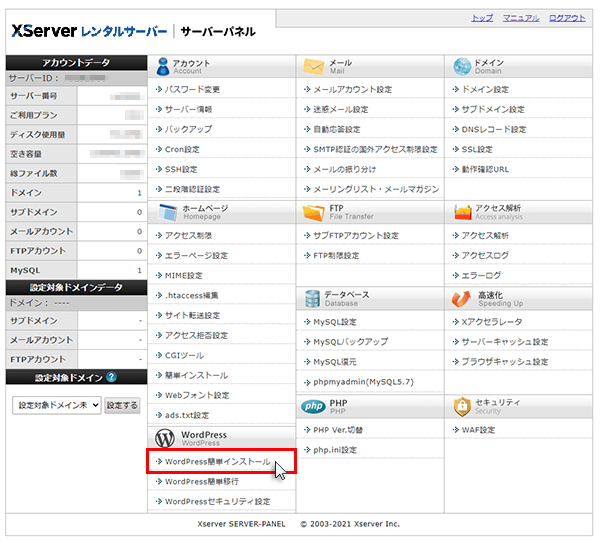
Run WordPress Easy Install
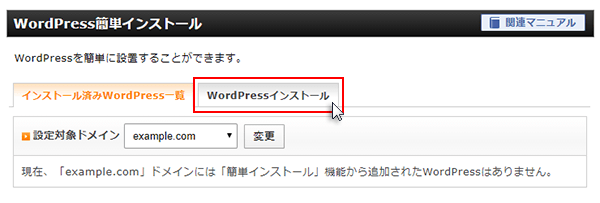
First, log in to your server panel and click on “Easy WordPress Install”.
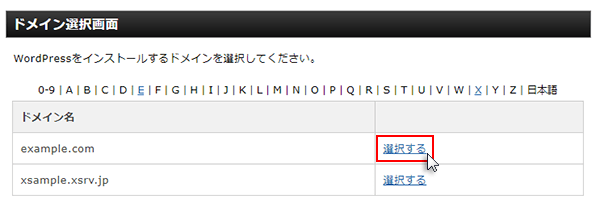
Select the domain you want to install WordPress on from the domains you added.
Go to the next page and click on “Install WordPress”.
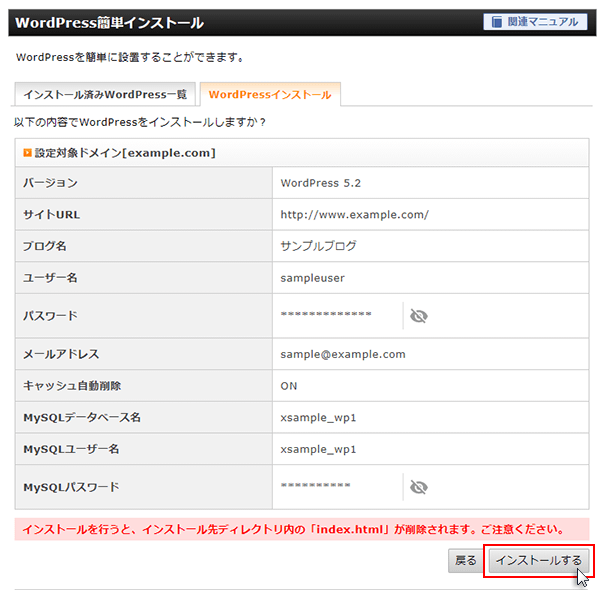
- Choosing a site URL (domain)
- Blog name (site title if a homepage)
- User name: Half-width alphanumeric characters, half-width spaces and some symbols
- password
- email address
- Automatic cache deletion: Default setting (ON) is OK
- Database: Default setting (automatically generate database) is OK
- Once you have entered all the information, click "Proceed to confirmation screen"
* For details about the number of characters and symbols that can be entered for each field, hover the cursor over the (?) on the right side of the field.

Check the details and press "Install".
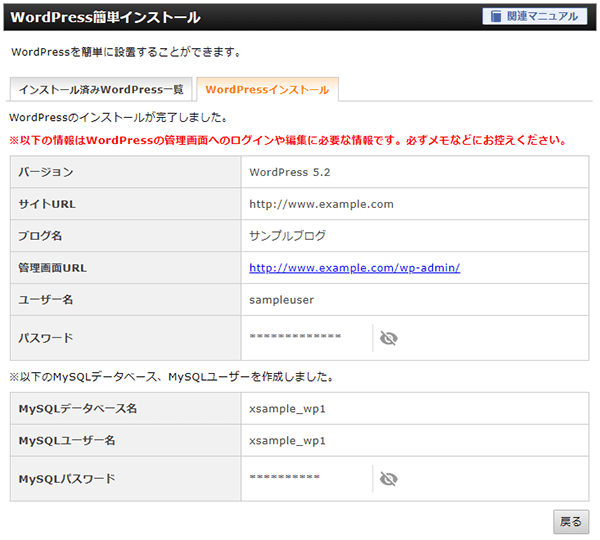
WordPress is now installed. Click on the displayed "Administration Screen URL" to access the WordPress login screen.
You can then build it however you like, including choosing the initial WordPress settings and a design template.
This method allows you to take advantage of the free trial and then migrate to full-scale WordPress operation later.
Log in to the WordPress admin page
After installation, log in to WordPress using the displayed "Administration Screen URL." Bookmark the Administration Screen URL.
If you have forgotten your password and cannot log in, you can reissue it from the login screen.
If you cannot log in for other reasons such as an error screen, there are several possible reasons. Please solve the problem by asking the AI or contacting Xserver support.
WordPress initial settings and recommended customizations
Permalink Settings
Permalink is the URL format assigned to each article or page. For example, you can change it to the following:
https://example.com/?p=123 (default setting)
↓ ↓ ↓
https://example.com/sample-post (custom setting)
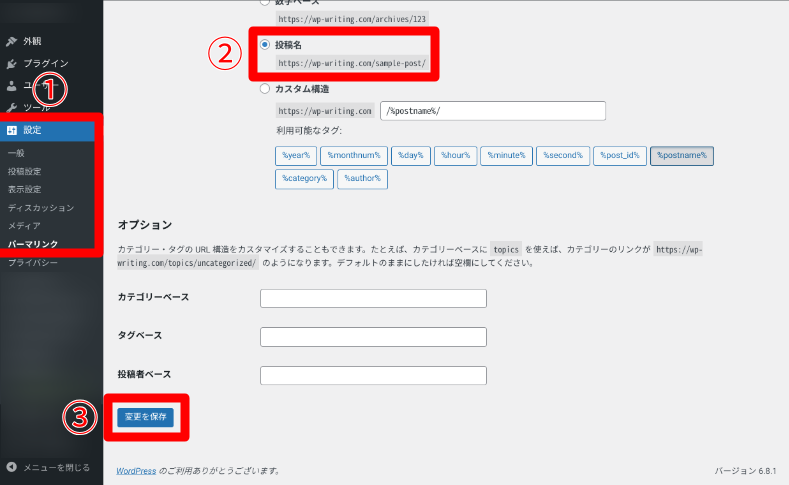
For SEO purposes and ease of viewing for users, it is common to set it to "Post Name (/%postname%/)".
To set this up, go to "Settings" → "Permalinks" in the WordPress admin screen, select the post name, and click "Save" to complete the setup.
Choosing a WordPress Theme
A WordPress theme is a template for the design, layout, and functionality of a website.
You can change the appearance (color, font, layout) and structure of the post list, static pages, header, footer, etc. in one go. There are free and paid themes, so you can choose according to your purpose and preferences.
*This site uses the TCD theme.
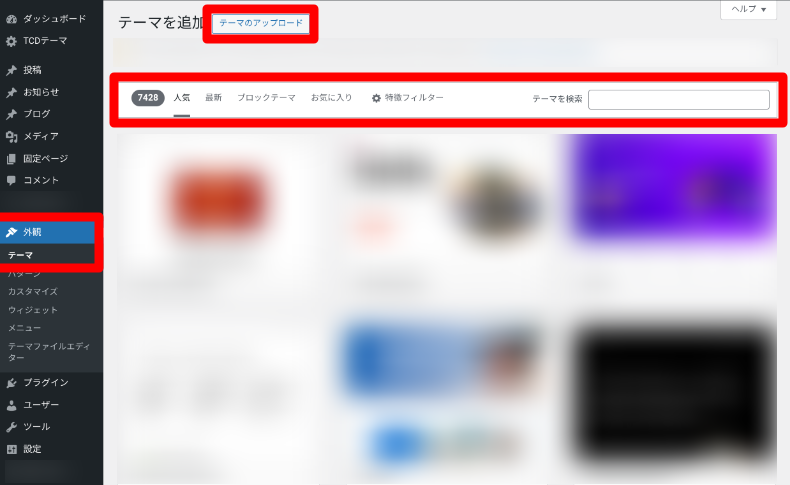
To change the theme, select "Appearance" → "Themes" in the WordPress admin screen and choose from a variety of themes. Also, if you have purchased a paid theme, you can install it by clicking "Upload Theme" at the top.
3. WordPress Plugin
A WordPress plugin is an extension tool that allows you to add new functions to your site. For example, you can add functions simply by installing the following plugins:
- セキュリティ対策:
CloudSecure WP Security、XO Security、SiteGuard WP Plugin - SEO対策:
SIMPLE SEO PACK、All in One SEO、Yoast SEO - お問い合わせフォーム:
Contact Form、Googleフォーム(プラグインではないが貼り付けられる)
*Xserver and WordPress themes may have similar functions. If functions are duplicated, problems may occur, so please be careful when installing and configuring.
You can also add plugins for a variety of other functions.
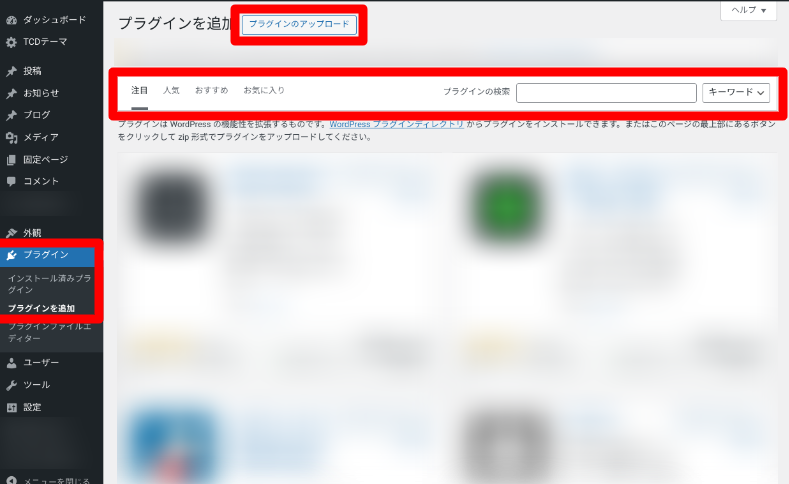
To check for plugins, click "Plugins" → "Add Plugins" in the WordPress admin panel. Then, search for and install plugins from the menu at the top.
If you have downloaded a plugin from another website, you can install it by uploading the file from "Upload Plugin" at the top.
Points to note when transferring or deleting multiple sites
- Multi-site management:
Just set a subdomain such as __.example.com from the server management screen. - WordPress Migration:
Xserver's "Easy Migration" feature allows you to move from other companies' servers - How to remove:
Can be deleted from the Xserver administration screen
Summary: Xserver is safe for WordPress beginners
Xserver is a rental server that combines beginner-friendly settings and high performance. If you want to start a WordPress blog, start with a free trial.